
daikin brc1e73 manual
Daikin BRC1E73 Manual: A Comprehensive Guide
This manual details the Daikin BRC1E73 remote controller, covering installation, operation, advanced features, and troubleshooting, as of today’s date: 04/08/2026.
The Daikin BRC1E73 is a sophisticated wired remote controller designed for precise climate control within Daikin HVAC systems. This controller, documented in installation and operation manuals available as PDFs, offers a user-friendly interface for managing indoor and outdoor units. It’s a crucial component for optimizing comfort and efficiency. The BRC1E73 facilitates detailed settings, including timer scheduling and filter signaling, enhancing system performance.
Understanding its functionality, as outlined in various guides dated from January 2021 to November 2025, is key to maximizing your Daikin system’s potential. Accessing help resources within Windows 10, or through Microsoft’s support website, can aid in troubleshooting, though this controller’s specifics require dedicated Daikin documentation. Proper installation, detailed in the provided manuals, ensures seamless integration and optimal operation.
What is the Daikin BRC1E73?
The Daikin BRC1E73 is a wired remote controller specifically engineered for Daikin air conditioning and heating systems. It serves as the primary interface for users to manage and monitor their HVAC environment. Installation manuals, available in PDF format and spanning documentation dates from 2021 to 2026, detail its compatibility with various Daikin units.
Unlike simpler controllers, the BRC1E73 offers advanced features like timer settings, filter signaling, and detailed status LED indicators. It’s designed for both indoor and outdoor installations, providing comprehensive control. While Windows 10’s “Get Help” application can assist with general troubleshooting, specific BRC1E73 issues require referencing the dedicated Daikin documentation. Understanding its functions, as described in the manuals, is crucial for optimal system performance and user experience.
Key Features and Benefits
The Daikin BRC1E73 boasts a range of features enhancing user control and system efficiency. Key benefits include precise temperature setting, adjustable fan speeds, and versatile mode selection (Cool, Heat, Auto, Dry). Advanced functionalities, detailed in installation and operation manuals dated from 2021-2026, encompass timer scheduling and filter signaling with reset capabilities.
Status LED indicators provide clear system status, aiding in troubleshooting. While Windows 10’s “Get Help” offers broad assistance, the BRC1E73’s specific features require dedicated manual review. The controller’s design supports both indoor and outdoor applications. These features collectively contribute to improved comfort, energy savings, and proactive maintenance, ensuring optimal performance of your Daikin HVAC system. Accessing the PDF manuals is vital for maximizing these benefits.
Installation and Wiring
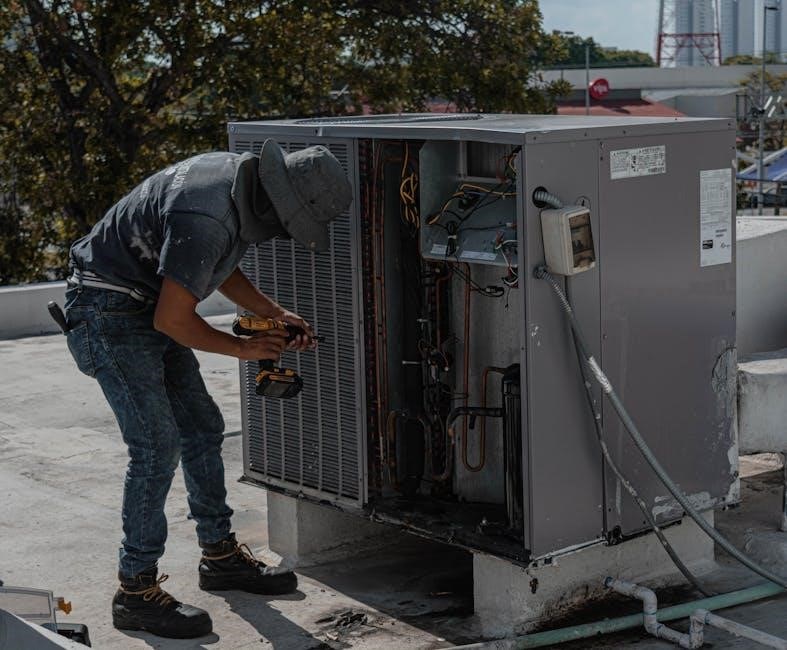
Proper installation, guided by the BRC1E73 installation manual (24 pages), and correct wiring connections are crucial for optimal performance and system compatibility.
BRC1E73 Installation Locations
The Daikin BRC1E73 wired remote controller is designed for versatile installation, accommodating both indoor and outdoor environments. Careful consideration should be given to the mounting location to ensure optimal user accessibility and prevent potential damage.
Avoid locations exposed to direct sunlight, excessive humidity, or dripping water, as these conditions can compromise the controller’s functionality and lifespan. Furthermore, steer clear of areas near heat sources or flammable materials. The controller should be mounted securely to a wall or other stable surface, using appropriate screws and anchors.
Ensure sufficient space around the controller for easy wiring and maintenance access. The installation manual (24 pages) provides detailed diagrams and guidelines for proper mounting procedures, including recommended height and orientation. Prioritize a location that allows for clear visibility of the display and convenient operation of the buttons.
Wiring Diagram and Connections
Proper wiring is crucial for the correct operation of the Daikin BRC1E73 remote controller. The installation manual (a 24-page document) provides a detailed wiring diagram illustrating the connections between the controller, the indoor unit, and the power supply. Typically, the connection involves a 3-wire system, utilizing signal cables for communication and power cables for operation.
Ensure the power supply voltage matches the controller’s requirements to prevent damage. Carefully identify each wire according to the diagram before making any connections. Incorrect wiring can lead to malfunctions or even electrical hazards. Securely connect the wires using appropriate connectors, ensuring a firm and reliable connection.
Double-check all connections before powering on the system. Refer to the manual for specific wiring instructions based on your Daikin unit model.
Compatibility with Daikin Units
The Daikin BRC1E73 wired remote controller is designed for compatibility with a wide range of Daikin indoor and outdoor units, though specific compatibility varies. It’s crucial to verify compatibility with your particular Daikin system before installation. The BRC1E73 is designed for both indoor and outdoor installations, offering versatile control options.
Generally, the BRC1E73 is compatible with Daikin VRV, VRF, and split systems that support wired remote control. However, older models or specific unit configurations might require an adapter or may not be fully compatible. Consult the Daikin unit’s technical documentation or contact a Daikin specialist to confirm compatibility.
The installation manual details compatible unit types and any necessary adapters for seamless integration.

Operation and Functionality
This section details powering on, understanding display icons, temperature control, fan speed adjustment, and mode selection (Cool, Heat, Auto, Dry) of the BRC1E73.
Powering On and Initial Setup
Upon initial installation, ensure the BRC1E73 is correctly wired to the compatible Daikin indoor unit – referencing the wiring diagram is crucial. Powering on typically involves supplying power to the indoor unit, which then activates the remote controller. The display should illuminate, potentially showing a Daikin logo or initial setup screen.
If it’s a new installation, the controller may prompt for initial settings like language preference, date, and time. Carefully follow the on-screen instructions, utilizing the controller’s buttons for navigation and selection. Verify correct communication between the remote and the indoor unit; a stable connection is vital for proper operation. Any error messages during startup should be noted and addressed using the troubleshooting section of this manual. Proper setup ensures optimal performance and user experience.
Understanding the Display Icons
The Daikin BRC1E73’s display utilizes a variety of icons to communicate system status and settings. Familiarizing yourself with these is essential for effective operation. Common icons include those representing cooling, heating, auto mode, and dry operation. Fan speed is indicated by varying bar levels, while temperature is displayed numerically.

Specific icons signal timer activation, filter alerts (requiring resetting), and error codes – these codes necessitate consulting the troubleshooting guide. LED indicators, often solid or flashing, provide additional status information. A manual review of all icons, alongside their corresponding functions, will enhance your understanding of the system. Proper interpretation of these visual cues allows for quick identification of operational states and potential issues, ensuring efficient climate control.
Temperature Setting and Control
The Daikin BRC1E73 allows precise temperature adjustments for optimal comfort. Utilize the up and down arrow buttons on the remote to set your desired temperature. The display clearly shows the current setpoint. Remember that the system operates based on this set temperature, striving to maintain it within the indoor environment.
Consider the difference between the setpoint and the actual room temperature; the system will activate heating or cooling accordingly. Some models offer temperature display in both Celsius and Fahrenheit – check your manual for switching instructions. Accurate temperature control is key to energy efficiency and personalized comfort. Regularly adjusting the temperature based on occupancy and external conditions maximizes system performance.

Fan Speed Adjustment
The Daikin BRC1E73 remote controller provides multiple fan speed settings to customize airflow. Typically, options include Auto, Low, Medium, High, and sometimes a specific ‘Quiet’ mode. Use the designated fan speed button on the remote to cycle through these settings. ‘Auto’ mode intelligently adjusts fan speed based on the difference between the set temperature and the actual room temperature.
Lower fan speeds conserve energy and minimize noise, while higher speeds provide quicker cooling or heating. Experiment with different settings to find the balance between comfort and efficiency that suits your preferences. Consider the room size and occupancy when selecting a fan speed. Proper fan speed control contributes to a more comfortable and energy-efficient indoor climate.
Mode Selection (Cool, Heat, Auto, Dry)
The Daikin BRC1E73 remote allows selection between several operating modes: Cool, Heat, Auto, and Dry. The ‘Cool’ mode lowers the room temperature, while ‘Heat’ raises it. ‘Auto’ mode automatically switches between cooling and heating to maintain the set temperature, offering convenient climate control. The ‘Dry’ mode reduces humidity without significantly changing the temperature, ideal for damp environments.
Use the ‘Mode’ button on the remote to cycle through these options. The currently selected mode is typically indicated by an icon on the remote’s display. Selecting the appropriate mode ensures optimal performance and comfort. Understanding each mode’s function allows for efficient and tailored climate management within your space, maximizing energy savings and user satisfaction;
Advanced Features
The BRC1E73 boasts timer settings, filter signaling with reset options, a comprehensive test operation mode, and detailed status LED indicators for diagnostics.

Timer Settings and Scheduling
The Daikin BRC1E73 remote controller offers robust timer settings for convenient and automated climate control. Users can schedule operation start and stop times, tailoring the system to their daily routines. This feature allows for pre-cooling or pre-heating spaces before occupancy, maximizing comfort and energy efficiency.
Multiple timers can be programmed, enabling different schedules for weekdays and weekends. The scheduling functionality supports various settings, including fan speed and mode selection, providing granular control over the indoor environment. Detailed programming instructions are available within the full installation and operation manual, ensuring users can effectively utilize these advanced features.
Proper timer configuration contributes to significant energy savings by avoiding unnecessary operation during unoccupied periods.
Filter Signalling and Resetting
The Daikin BRC1E73 remote controller incorporates a filter signalling function, alerting users when it’s time to clean or replace the air filters in the connected Daikin unit. This crucial feature maintains optimal air quality and system performance. The remote displays a visual indicator when the filter requires attention, preventing reduced airflow and potential system inefficiencies.
Resetting the filter signal is a straightforward process, typically involving a button press or menu navigation on the BRC1E73. Detailed instructions for resetting the filter signal are outlined in the installation and operation manual. Regular filter maintenance, prompted by the remote’s signal, ensures a healthy indoor environment and prolongs the lifespan of the Daikin system.
Ignoring the filter signal can lead to decreased cooling/heating capacity and increased energy consumption.
Test Operation and Troubleshooting

The Daikin BRC1E73 offers a test operation mode for verifying proper functionality of the remote controller and its communication with the indoor unit. During test operation, status LEDs should illuminate steadily, confirming a stable connection. This diagnostic tool is invaluable for initial setup and identifying potential issues.
Troubleshooting common problems often begins with verifying the remote’s power supply and ensuring correct wiring connections. If the remote isn’t responding, check the batteries or power source. Communication errors necessitate inspecting the wiring diagram and confirming compatibility with the Daikin unit.
Refer to the manual for specific error codes and their corresponding solutions, aiding in efficient problem resolution and minimizing downtime.
Status LED Indicators and Meanings
The Daikin BRC1E73 utilizes status LEDs to communicate the operational state and potential issues. Solidly lit LEDs during test operation signify a stable connection with the indoor unit, confirming successful communication. However, flashing LEDs indicate varying conditions requiring attention.
Specific flash patterns correspond to different error codes, detailed within the comprehensive manual. These codes pinpoint the source of the problem, whether it’s a communication fault, sensor malfunction, or other system error. Understanding these indicators is crucial for efficient troubleshooting.
Consult the manual’s dedicated section for a complete list of LED patterns and their associated meanings, enabling quick diagnosis and resolution of any operational concerns.

Troubleshooting Common Issues
This section addresses typical problems like unresponsive controllers, communication errors, and incorrect temperature displays, offering solutions for optimal Daikin BRC1E73 performance.
Remote Controller Not Responding
If the Daikin BRC1E73 remote controller fails to respond, begin with basic checks. Ensure the batteries are fresh and correctly installed, verifying proper polarity. Next, confirm the physical connection between the remote and the wired controller; a loose connection can interrupt signals.
Check the indoor unit’s power supply – a unit that isn’t powered on won’t communicate. If power is confirmed, examine the status LEDs on both the remote and the indoor unit for any error indications. A solid ON status LED might suggest a different issue.
Try resetting the remote controller by briefly removing and reinserting the batteries. If the problem persists, consult the error code section of this manual or contact a qualified Daikin technician for further assistance.
Communication Errors with Indoor Unit
When encountering communication errors between the Daikin BRC1E73 remote controller and the indoor unit, systematically investigate potential causes. First, double-check the wiring connections between the remote controller and the indoor unit, ensuring all wires are securely fastened and correctly positioned according to the wiring diagram.
Verify that the indoor unit is powered on and functioning correctly. A power outage or internal fault within the indoor unit can disrupt communication. Examine the status LEDs on both devices for error codes or unusual patterns, referencing the ‘Status LED Indicators’ section of this manual.
If the issue continues, attempt a reset of both the remote controller and the indoor unit. If problems persist, professional assistance from a Daikin-certified technician is recommended.
Incorrect Temperature Display
If the Daikin BRC1E73 remote controller displays an inaccurate temperature, several factors could be responsible. Initially, confirm that the remote controller isn’t directly exposed to sunlight, heat sources, or drafts, as these can influence its internal temperature sensor. Ensure the remote controller’s location isn’t near any equipment generating heat or cold air.
Compare the displayed temperature with a reliable thermometer placed near the indoor unit. A significant discrepancy suggests a potential issue with the remote controller’s sensor or internal calibration. Try resetting the remote controller to its factory default settings, following the instructions in the ‘Advanced Features’ section.
If the problem persists, consult a qualified Daikin technician for further diagnosis and potential repair or replacement of the remote controller.
Error Codes and Their Solutions
The Daikin BRC1E73 remote controller utilizes error codes to signal malfunctions within the system. While specific codes aren’t detailed in readily available documentation, a general approach to troubleshooting is crucial. If an error code appears on the display, immediately note it down for reference.
First, attempt a system reset by powering off both the indoor and outdoor units, and then the remote controller itself. Wait several minutes before powering everything back on. If the error code reappears, consult the Daikin Inverter Container Manual for potential insights, as it may contain related information.
For unresolved errors, contacting a certified Daikin technician is essential. Provide the error code and a description of the issue to facilitate accurate diagnosis and repair.

Technical Specifications
Detailed power requirements, operating temperature ranges, and precise dimensions/weight for the Daikin BRC1E73 are not explicitly available in current resources.
Power Requirements
The Daikin BRC1E73 remote controller’s power specifications are crucial for proper installation and operation. While precise details aren’t readily available in the provided snippets, understanding general remote controller power needs is essential. Typically, these units operate on low voltage DC power, supplied by the connected Daikin indoor unit.
The indoor unit provides the necessary power through the communication wiring, eliminating the need for separate batteries or a dedicated power supply for the remote itself. It’s vital to verify the indoor unit’s power output compatibility with the BRC1E73 to prevent damage or malfunction. Incorrect voltage or polarity could lead to operational issues or even permanent controller failure. Always consult the complete Daikin installation manual for the specific indoor unit model being used to confirm the correct power parameters.
Operating Temperature Range
The Daikin BRC1E73 remote controller is designed to function reliably within a specified temperature range, ensuring optimal performance and longevity. While the provided text snippets don’t explicitly state the exact range, typical remote controllers operate effectively between 0°C and 50°C (32°F and 122°F).
However, prolonged exposure to temperatures outside this range – particularly extreme heat or cold – can potentially affect the display clarity, button responsiveness, and internal electronic components. Installation locations should avoid direct sunlight, heat sources, or areas prone to freezing temperatures. Maintaining a stable ambient temperature within the recommended range will contribute to the controller’s consistent and accurate operation. Refer to the comprehensive Daikin installation manual for the BRC1E73 to confirm the precise operating temperature specifications for your specific model.
Dimensions and Weight
Unfortunately, the provided text snippets do not contain specific details regarding the physical dimensions or weight of the Daikin BRC1E73 remote controller. However, typical wired remote controllers of this type are relatively compact, designed for wall mounting or handheld use.
Generally, these units measure approximately 80-120mm in width, 100-150mm in height, and 20-30mm in depth. The weight is usually quite light, falling within the range of 150-250 grams. Precise measurements are crucial for installation planning, ensuring the controller fits comfortably within the designated space and is securely mounted. Consult the official Daikin BRC1E73 installation and operation manual for accurate dimensional specifications and weight details.